REVIEW · GREAT OCEAN ROAD & 12 APOSTLES
Great Ocean Road Reverse Tour with Iconic Stops & Wildlife
Book on Viator →Operated by Vast Group · Bookable on Viator
The road is iconic, but the logistics can be rough. This reverse-style coach tour gives you live guiding while it strings together Loch Ard Gorge and the Twelve Apostles, with chances to see wildlife along the way. I love that the group stays easy to follow in an air-conditioned vehicle, and I also like how guides such as Hugh and Ray share practical local tips, not just big-picture descriptions. The catch is simple: it’s a long day, and if you’re sensitive to motion or easily disappointed by time limits, the bus hours can wear on you.
You can also choose a Melbourne pick-up point that fits your morning, which helps if you want a quick start and less faffing. The day is built around major photo stops and short breaks, so it’s a great fit if your priority is seeing the famous coastline without map stress. Just keep your expectations realistic: this is sightseeing on a schedule, not a slow wander.
In This Review
- Key things that make this tour work well
- Why the reverse route from Melbourne feels smarter
- Getting on board: pick-up points, seat strategy, and comfort
- The full day itinerary: what you’ll do and what to expect
- Stop 1: Melbourne departure (your start line)
- Stop 2: Loch Ard Gorge (short, powerful, and story-driven)
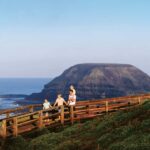
- Stop 3: The Razorback (views that reward the stop time)
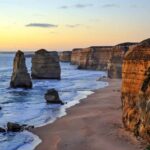
- Stop 4: The Twelve Apostles (the main event)
- Stop 5: Great Ocean Road koala chance (the built-in wildlife moment)
- Stop 6: Apollo Bay lunch break (more sea town than tourist trap)
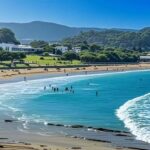
- Stop 7: Lorne Beach (classic Great Ocean Road vibe)
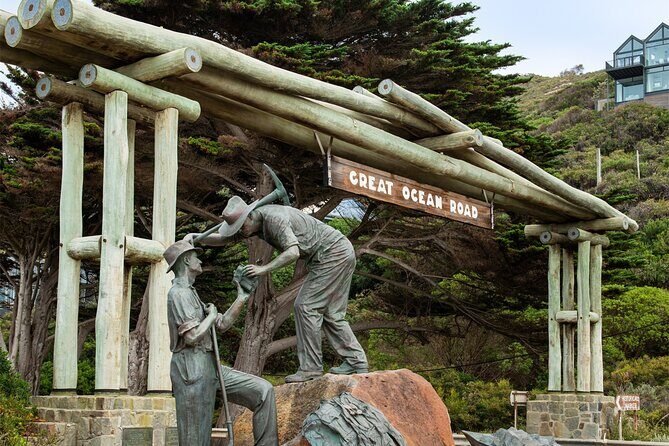
- Stop 8: Memorial Arch at Eastern View (gateway + a photo worth taking)
- Stop 9: Melbourne drop-off (end of the loop)
- Wildlife and koalas: how to set yourself up for the best odds
- Food, timing, and motion: make the long day feel shorter
- Price and value: is $40.17 reasonable for this itinerary?
- Who this tour suits best (and who should be picky)
- Should you book it? My practical call
- FAQ
- Where are the Melbourne pick-up locations?
- How long is the tour?
- What is included in the ticket price?
- What is not included?
- Is koala spotting guaranteed?
- Can I cancel for a full refund?
Key things that make this tour work well

- Reverse route timing: you hit the standout sights earlier instead of fighting for space later
- Air-conditioned comfort: long coach hours feel easier when the vehicle is climate controlled
- Guides who coach you through it: people like Hugh, David, Daniel, Tony, and Nam often share helpful context and on-the-ground tips
- Photo-stop pacing: enough time to enjoy views, but not so much that you lose the day on any one spot
- Wildlife chances: koala spotting is built into the day, though it depends on conditions
- Multiple Melbourne pick-up points: Bourke St, Lonsdale St, or Spencer St give you options
Why the reverse route from Melbourne feels smarter
The Great Ocean Road is one of those places where crowds can pile up around the famous lookouts. Doing it in reverse can help because you’re working through the big hitters with a bit more breathing room, rather than arriving when everyone else already has their best angles. It’s also efficient: you’re already on the coast doing the main sights, then you work your way back to Melbourne along the road.
I also like that reverse touring fits different travel styles. If you’re short on days in Melbourne, a 12-hour loop is a practical way to see the coastal highlights in one go, while still keeping the schedule tight enough to make the most of daylight.
You can also read our reviews of more tours and experiences in Melbourne

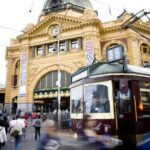
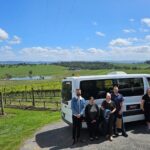
Getting on board: pick-up points, seat strategy, and comfort
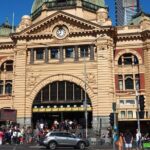
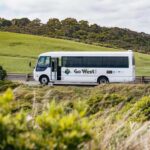
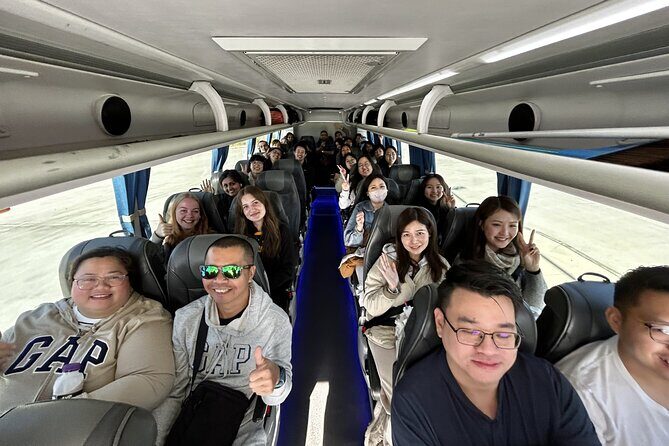
This tour runs with round-trip transfers and a mobile ticket, so you don’t need to juggle printed paperwork. You’ll board from one of three Melbourne locations: 131–135 Bourke St (7:10AM), 377 Lonsdale St (7:20AM), or 56 Spencer St (7:30AM). The meet-up spots are close to public transport, which can be handy if you’re coming in from elsewhere.
The vehicle is air-conditioned, which matters on a long drive where you’ll spend a lot of time looking out windows. The group size is capped at 50 travelers, so it doesn’t feel like you’re packed into a tiny space with no room to move between stops.
Seat tip that actually helps: if you care about ocean views, try to pick a seat on the side that faces the water and aim for earlier boarding. One review specifically praised the value of boarding at the earlier Melbourne stop for better views, and another mentioned how seating layout can change your sightlines at the most iconic part of the day. If you can, don’t treat seat selection as a small detail.
The full day itinerary: what you’ll do and what to expect
This is a “big stops, short breaks” kind of day. Expect live onboard commentary while you ride, then short windows to stretch, take photos, and get back on the bus.
Stop 1: Melbourne departure (your start line)
You’ll start from one of the three pick-up points, then head straight out for the day’s coastal sequence. This is where the tour rhythm sets in: listen for what the guide wants you to remember before you reach each lookout.
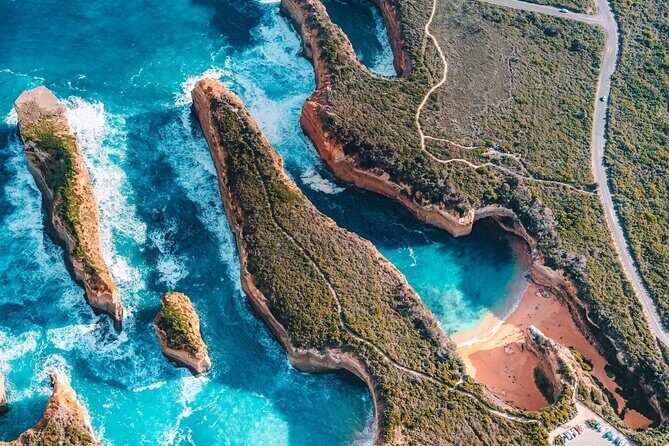
Stop 2: Loch Ard Gorge (short, powerful, and story-driven)
Loch Ard Gorge is famous for the wreck of the Loch Ard, which sank in 1878. You only get around 10 minutes here, so come ready to move quickly: one good walk for viewpoints, a few photos, then back to the group.
The value of this stop is that it gives you a human story to connect with the dramatic coastline you’ll keep seeing all day. Even with limited time, the shipwreck context helps the cliffs feel less random and more meaningful.


Stop 3: The Razorback (views that reward the stop time)
This is an impressive limestone formation with standout coastal views. You’ll have about 20 minutes, which is long enough to find a couple of angles for photos and still keep things on schedule.
If the weather is clear, this is one of those “make the effort to look longer” spots. The Razorback visuals tend to look best when you take a moment to step back and let the whole formation come into focus.
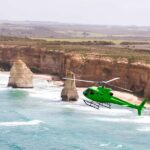
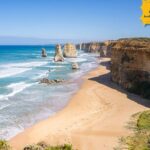
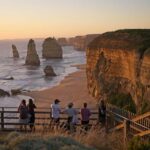
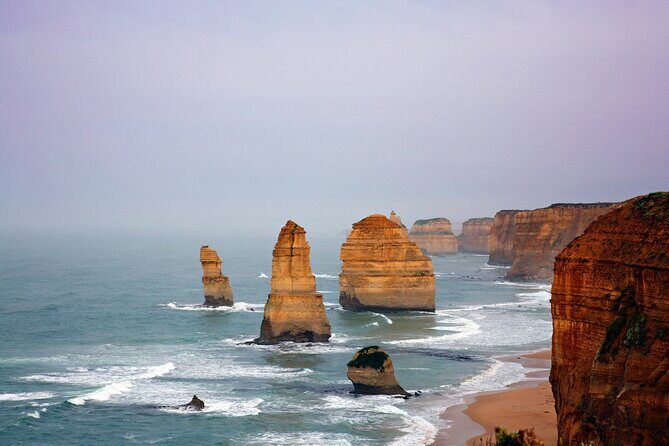
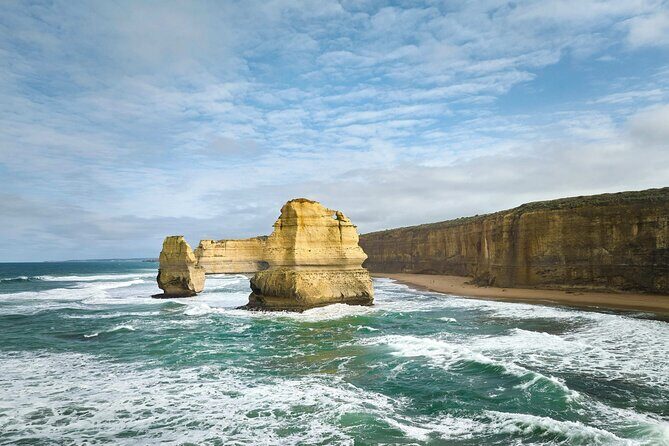
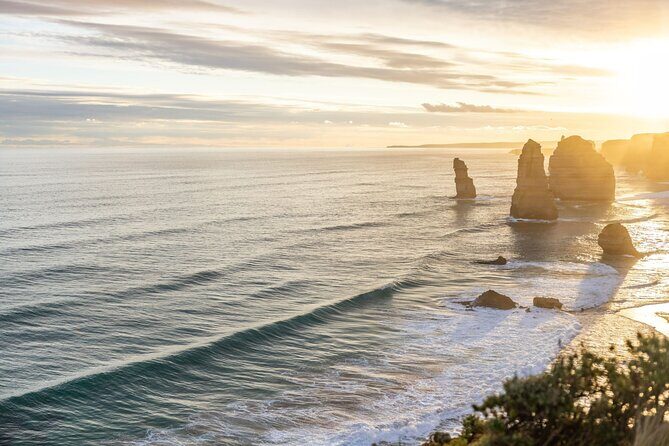
Stop 4: The Twelve Apostles (the main event)
The Twelve Apostles are the rock formations people picture when they think of the Great Ocean Road. You’ll get roughly 45 minutes here, and it’s time well used: it’s not just photos from one spot, and the coastline view changes as you walk.
Fun context worth noting: the formations were originally known as the Sow and Piglets, then renamed by settlers after the disciples of Jesus Christ. That kind of detail is exactly what makes the stop more than a quick snap.
This is also where timing matters most. One downside to watch for on any major-coast tour is that bus schedules and weather can affect how much time you can truly enjoy at the big lookouts. Most of the time it’s smooth, but keep a little flexibility in your mindset.
Stop 5: Great Ocean Road koala chance (the built-in wildlife moment)
You’ll stop at a section marketed as a spot to see koalas in the wild, with about 15 minutes allocated. This is one of the most exciting parts of the itinerary when it works—some guides have even been credited with spotting koalas for the group.
But be honest with yourself: wildlife isn’t guaranteed. One earlier experience described how koala spotting didn’t happen and the guide adjusted. So enjoy this as a chance, not a promise, and keep your eyes open while you ride as well.
Stop 6: Apollo Bay lunch break (more sea town than tourist trap)
Apollo Bay is your main lunch stop, with about 1 hour 15 minutes. It’s known as Paradise by the Sea, and it even has a nautical backstory tied to a sloop named Apollo that sheltered in the bay in 1845.
Because meals are not included, this is where you’ll decide what kind of lunch you want. Plan for real eating time: if you only grab a snack, you’ll likely wish you had more. If the weather’s good, consider walking a bit near the waterfront before you rejoin the bus.
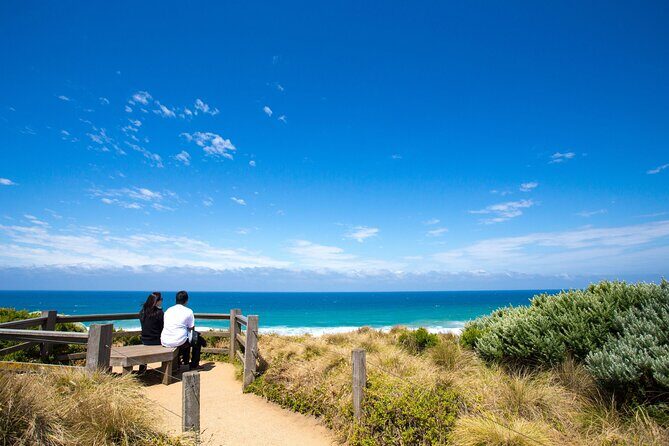
Stop 7: Lorne Beach (classic Great Ocean Road vibe)
You’ll get around 30 minutes at Lorne Beach. Lorne is one of the more popular towns along the road, with a laid-back seaside feel and strong ocean views.
This stop is ideal for a quick reset—fresh air, a short stroll, and a chance to stretch your legs before the later parts of the day.
Stop 8: Memorial Arch at Eastern View (gateway + a photo worth taking)
Memorial Arch at Eastern View marks the gateway to the Great Ocean Road and honors the soldiers who built the road. You’ll have about 15 minutes, which is enough for photos and a brief moment to read the context.
This stop is also a good “bridge moment” between the earlier dramatic cliffs and your return toward Melbourne. It helps the day feel connected rather than like separate random viewpoints.
Stop 9: Melbourne drop-off (end of the loop)
You’ll return to one of the original drop-off points at 131–135 Bourke St (5 minutes), 377 Lonsdale St (5 minutes), or 56 Spencer St (5 minutes). The day is long, so keep your evening plans flexible if you can.
Wildlife and koalas: how to set yourself up for the best odds
The tour includes a stop specifically positioned for koala spotting, and some guides have a knack for finding them. If you’re lucky, it’s one of those moments that makes the whole day feel extra worth it.
That said, koalas are wild animals. You can’t force it, and conditions matter: where the animal is sitting, how people move around, and whether it’s the kind of day wildlife is active. I’d treat the koala stop as “eyes up time,” and then keep enjoying the coastline no matter what.
Food, timing, and motion: make the long day feel shorter
Meals are on your own, which means you’ll want to plan how you’ll eat and recharge. Lunch happens in Apollo Bay, and the time is long enough for a proper meal if you use it wisely.
The bigger practical issue is the bus day itself. One review called out motion sickness concerns clearly, and another warned that after lunch the driving can get windy—so if you’re even slightly prone to nausea, bring what helps you (and consider sitting closer to the front or choosing the side that feels steadier for you).
Comfort checklist that matches the reality of this tour:
- Bring snacks for between stops, just in case
- Bring a layer for wind and changing conditions
- Use lunch time for a real meal, not just a quick bite
- Have a plan for photo breaks so you don’t rush the best viewpoints
Price and value: is $40.17 reasonable for this itinerary?
At $40.17 per person, this tour is positioned as a budget-friendly way to hit multiple iconic Great Ocean Road stops in one day. You’re paying for a lot of “logistics value”: guided transport, live onboard commentary, and round-trip transfers.
Here’s what makes it feel like real value: several of the key stops have admissions included (Loch Ard Gorge, The Razorback, and The Twelve Apostles). Other segments—like Lorne Beach and Memorial Arch—are free to enter, which means your money goes mostly toward getting you there and keeping the day organized.
The trade-off for the price is what you already expect on a coach tour: limited time per stop. You’re not meant to linger for long walks every place. If your dream is slow travel with long hikes, you may feel rushed. If your dream is seeing the headline sights without planning every detail, the price makes sense.
Who this tour suits best (and who should be picky)
This is a strong fit if you:
- Want a guided Great Ocean Road day without rental car stress
- Are seeing the Twelve Apostles and surrounding icons for the first time
- Like a schedule that balances multiple stops in one trip
- Value clear timing and an on-board guide who talks you through the route (some guides like Hugh, Ray, David, Daniel, Tony, Nam, William, and Phillip have stood out in this area)
I’d be more careful if you:
- Have motion sickness and know buses don’t agree with you
- Need long time at viewpoints instead of short look-and-go stops
- Are obsessed with a specific side detour at the last minute (sometimes plans can change on the day)
Should you book it? My practical call
If you’re doing Great Ocean Road as a one-day hit from Melbourne, this reverse-style coach tour is a sensible way to make the most of daylight. You get air-conditioned comfort, live commentary, major stops (Loch Ard Gorge, Razorback, Twelve Apostles), and a built-in wildlife chance—without you having to plot routes or worry about where to park.
I’d book it if your top priority is seeing the classics in one day and you’re okay with short stop times. Skip it—or choose something different—if you need slow pacing, have serious motion sickness issues, or want deep, flexible exploration at each location.
FAQ
Where are the Melbourne pick-up locations?
You can be picked up at 131–135 Bourke St (7:10AM), 377 Lonsdale St (7:20AM), or 56 Spencer St (7:30AM).
How long is the tour?
The tour is about 12 hours.
What is included in the ticket price?
The tour includes an air-conditioned vehicle, round-trip transfers, live commentary on board, and an experience and knowledge driver/guide. Admissions are included for stops like Loch Ard Gorge, The Razorback, and The Twelve Apostles.
What is not included?
Meals are not included, so you’ll pay for lunch on your own during the Apollo Bay stop.
Is koala spotting guaranteed?
No. The itinerary includes a stop for koala spotting, and some guides are able to spot koalas, but sightings depend on conditions and may not happen every day.
Can I cancel for a full refund?
Yes, you can cancel up to 24 hours in advance for a full refund.