REVIEW · MELBOURNE
4 Hour Private Tour of Melbourne’s Iconic Highlights with Guide
Book on Viator →Operated by Marks Private Melbourne Tours · Bookable on Viator
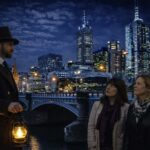
Four hours, and Melbourne feels close. This private outing strings together big-name sights with a local guide who can tailor the pace, plus easy hotel pickup to keep you from wrestling with parking. I especially liked the private guide attention—full explanations when you want them—and the smart mix of classic landmarks and street-level culture. The only real drawback is the timing: each stop is brief, so if you’re the slow-and-savor type, you may wish you had longer at one or two places.
You’ll cover Melbourne’s core, then swing out toward the bay for seaside icons and views. Most admissions are free, and you get bottled water, which sounds small until you’re walking from one quick photo moment to the next.
It runs in all weather, so dress for rain or sun and expect some uneven sidewalks around older parts of town. The route is packed, but it’s also a solid way to get your bearings fast on a first visit.
In This Review
- Key highlights at a glance
- A 4-hour route that hits big names (and still feels personal)
- Price and value for up to seven people
- Stop-by-stop: from St Paul’s Cathedral to Melbourne’s CBD core
- St Paul’s Cathedral (about 15 minutes, free)
- Federation Square (about 15 minutes, free)
- Parliament House of Victoria (about 5 minutes, free)
- Royal Exhibition Building (about 15 minutes, free)
- Shrine of Remembrance and Flinders Street Station: memorial views and the clocks
- Shrine of Remembrance (about 20 minutes, free)
- Flinders Street Station and its iconic clocks (about 10 minutes, free)
- Port Phillip Bay views, Luna Park, and St Kilda vibes
- Luna Park Melbourne (about 10 minutes, free)
- Hosier Lane street art and Brighton’s famous bathing boxes
- Hosier Lane (about 10 minutes, free)
- Brighton Bathing Boxes (about 20 minutes, admission included)
- Logistics that actually matter: timing, weather, and comfort
- Who this tour is best for (and who should look elsewhere)
- Should you book this private Melbourne highlights tour?
- FAQ
- How long is the private Melbourne highlights tour?
- What is the group size limit?
- How much does the tour cost?
- What’s included in the price?
- What is the meeting point?
- Where does the tour end?
- Are admissions included?
- Does it run in bad weather?
- What is the cancellation policy?
Key highlights at a glance

- Private, flexible itinerary with a local guide steering the day
- Hotel pickup and drop-off so you start in the city, not in traffic
- Street art and seaside culture with Hosier Lane and Luna Park
- Iconic Melbourne landmarks from Flinders Street Station to the Shrine
- Good value for groups up to seven with one flat price per group
A 4-hour route that hits big names (and still feels personal)
This tour is built for momentum. You’re with a guide in a private vehicle, then you step out at each stop long enough to understand what you’re looking at, grab photos, and move on. With a time window of about four hours, you can cover a lot of the city’s highlights without turning the day into a commute marathon.
A nice detail is how the setup is designed to reduce downtime. One review notes a setup where the driver handles the car while the guide stays with you during stops. The practical result: less time waiting, less time figuring out where to park, and more time walking the sights.
And because it’s private, your guide can respond to what you care about most—whether that’s architecture, history, street art, shopping streets, or just getting the best viewpoints.
You can also read our reviews of more guided tours in Melbourne


Price and value for up to seven people
The price is $1,075.15 per group (up to seven people). That means this tour can be a good deal if you’re traveling as a small group or family and want one guided plan instead of multiple taxis or self-guided navigation.
A quick sanity check: if you fill the group, you’re roughly at the cost of a modest guided day tour per person rather than a premium individual rate. If you don’t fill all seven seats, the value drops—but you still gain real convenience: hotel pickup, private transport, and a guide who helps you see more in less time.
Also note the schedule reality: it’s commonly booked about 40 days in advance on average. If you’re traveling during popular periods, I’d treat it like a “plan early” item, not a last-minute add-on.
Stop-by-stop: from St Paul’s Cathedral to Melbourne’s CBD core
St Paul’s Cathedral (about 15 minutes, free)
You start with St Paul’s Cathedral, a bluestone landmark on a hill. Even if you’re not the “go inside every church” type, it’s worth it for the exterior presence and the way the building anchors the city.
The biggest payoff here is orientation. As you look around, your guide can connect the skyline and streets to what Melbourne has been over time—so later stops make more sense.
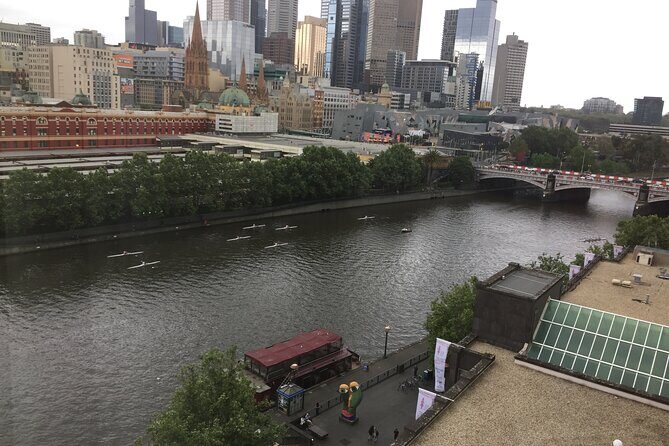
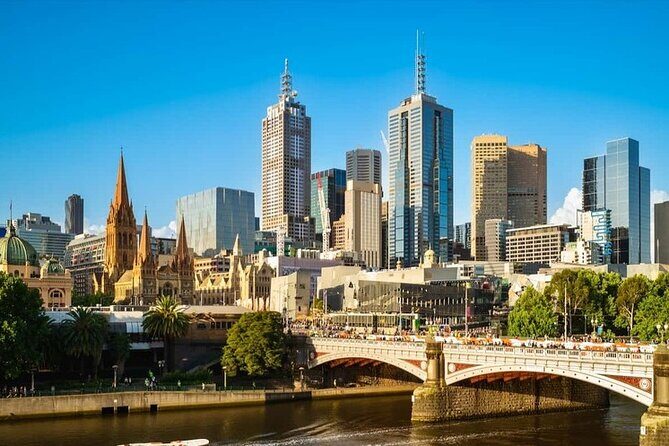
Federation Square (about 15 minutes, free)
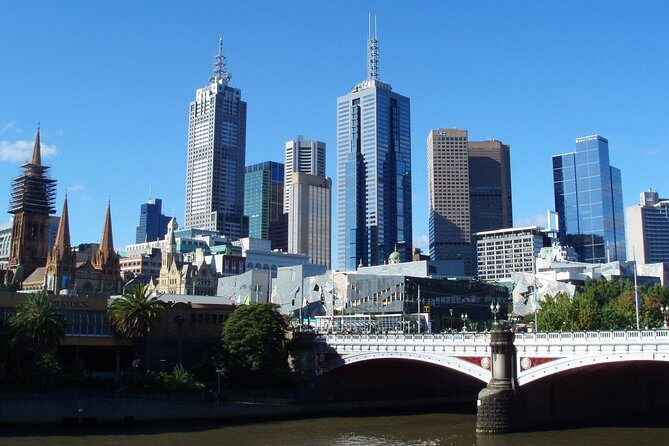
Next is Fed Square, the area near the Yarra River that often feels like the city’s meeting point. It’s close to major routes and makes a good pivot point in the morning because you can scan the wider area without committing to a long walk.
You’ll likely get time for quick photos and a sense of direction—useful if you plan to explore on your own afterward.
You can also read our reviews of more private tours in Melbourne


Parliament House of Victoria (about 5 minutes, free)
This is a short stop, by design. Parliament House gives you a classic government-building view over Bourke Street, one of the big shopping streets. Five minutes can feel skimpy, but it’s enough for a photo and a quick story about how the CBD fits together.
If you hate rushing, treat this as a “photo and move on” moment—not a deep detour.
Royal Exhibition Building (about 15 minutes, free)
Then comes the Royal Exhibition Building, an UNESCO-listed structure built in the booming 1880s. It’s a strong shift from the modern energy of Fed Square into a more formal, long-arc architectural feel.
This is one of those stops where a good guide matters. When you understand what the building was for and why it’s recognized internationally, it stops being just a pretty façade.
Shrine of Remembrance and Flinders Street Station: memorial views and the clocks
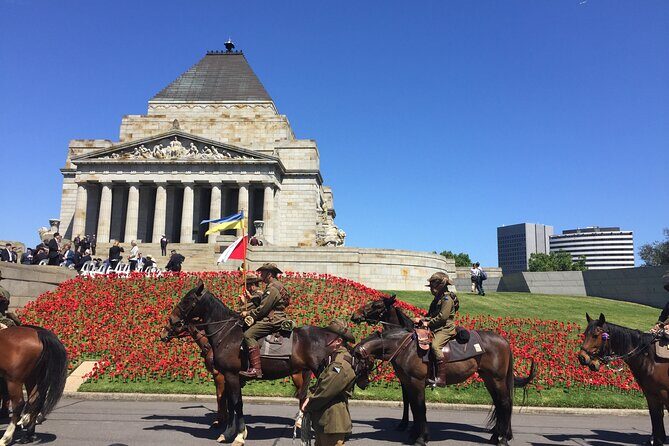
Shrine of Remembrance (about 20 minutes, free)
The Shrine of Remembrance is Victoria’s major war memorial. Plan on using the time both for the monument itself and the views back across Melbourne’s skyline.
The “why it’s worth it” angle: it gives context. In a city tour, memorial sites can feel like a hard left turn—until you step back and see how they sit in the city’s geography. It becomes easier to understand the city’s identity when you’ve seen a place built for reflection.
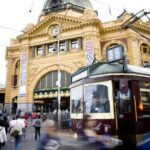
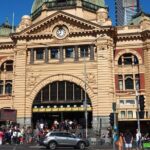
Flinders Street Station and its iconic clocks (about 10 minutes, free)
Flinders Street Station is one of those Melbourne images that looks like it belongs on every postcard for a reason. Those famous clocks catch your eye instantly, and the station’s lively setting helps you feel how central this area is.
If you’re hoping to include a longer photo session, you may want to stay flexible after this stop. The tour’s schedule makes this a quick highlight, but the station is a place you could happily linger if time allows.
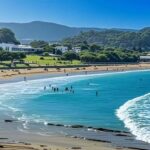
Port Phillip Bay views, Luna Park, and St Kilda vibes
After Flinders Street, you’ll get views across Port Phillip Bay. This is a smart mid-tour break: you step away from dense city blocks and reset your perspective with water and open space.
Luna Park Melbourne (about 10 minutes, free)
Then you head to Luna Park. The goal here isn’t a full theme-park day—it’s the seaside icon and the quick atmosphere of St Kilda around it.
Ten minutes works if you’re mainly there for the façade, the photos, and the sense of where Melbourne goes when the day shifts from city to coast. If you want rides and tickets, you’ll need more time than the tour provides.
Hosier Lane street art and Brighton’s famous bathing boxes
Hosier Lane (about 10 minutes, free)
Hosier Lane is world-famous street art for a reason: it’s immediate and visual, and it changes over time. The guide’s value here is timing and context—what you’re seeing, how the lane became known, and how to read the pieces rather than just treating them like background color.
Ten minutes is short, but street art doesn’t require hours if you know what to look for: layers, tags, styles, and the way new murals sit over older ones.
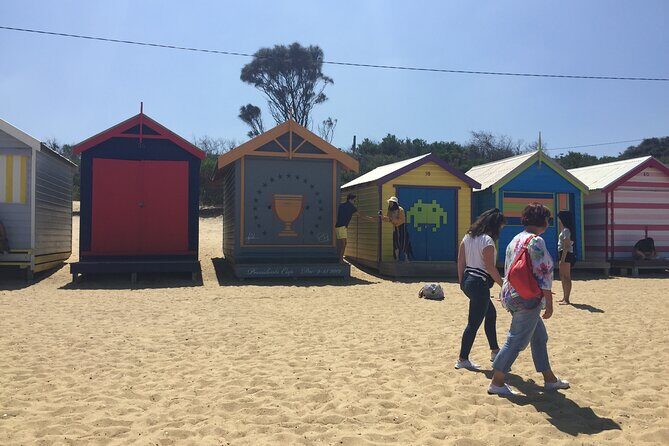
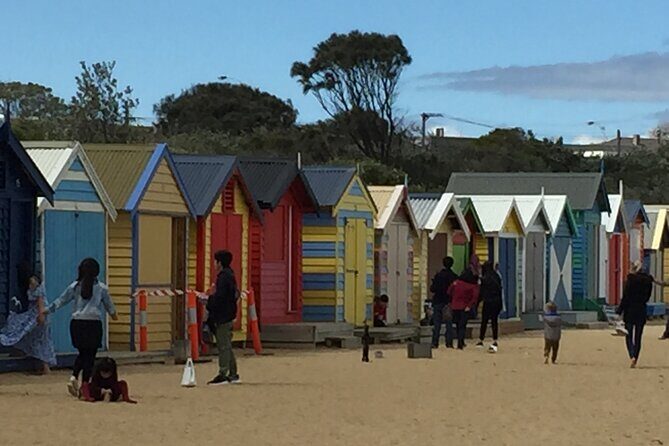
Brighton Bathing Boxes (about 20 minutes, admission included)
Finally, Brighton Bathing Boxes deliver color on a beach. You’ll get about twenty minutes here, which is enough time to walk the line, compare box designs, and appreciate the creativity without feeling rushed.
This stop also comes with included admission, which matters for value. It turns the last segment into something more than a quick photo pull-over.
The boxes are also a great way to end the tour because they feel playful after the memorial and civic stops earlier in the day.
Logistics that actually matter: timing, weather, and comfort
This is a private tour, so only your group participates. That’s a big quality-of-life upgrade if you don’t want to match your pace to a large group.
You also get bottled water and a mobile ticket. Those small perks reduce friction—especially in Melbourne where weather can shift quickly.
Wear comfortable shoes. You’re doing a chain of short walks between stops, and some areas have older streets and sidewalks where you’ll want sure footing. If you’re visiting on a rainy day, the tour still operates, but your comfort will depend on what you bring.
Who this tour is best for (and who should look elsewhere)

This tour fits best if you want:
- A first-hit orientation to Melbourne’s major sights
- A short list that includes street art, classic architecture, and a bay-side finale
- A guide to explain what you’re seeing without turning the day into a classroom
It may feel less ideal if you:
- Want long time for only one neighborhood (this is a full circuit)
- Are primarily looking for a deep museum day or extended ticketed attractions
- Hate moving every stop on a tight schedule
Think of it as a high-efficiency highlights sampler with guide context—not a slow, linger-everywhere wandering tour.
Should you book this private Melbourne highlights tour?
If your goal is to see a lot of Melbourne in one guided morning/afternoon, this tour makes sense. The flat group price, hotel pickup, private transport, and mostly free admissions add up to a practical way to avoid wasting half a day figuring out logistics.
I’d book it if you’re traveling in a group of friends, a family unit, or anyone who wants convenience plus a knowledgeable local perspective. I’d hesitate if you’re the kind of person who can’t enjoy a stop unless you’ve got time to wander for an hour or two.
Overall, it’s a strong way to get oriented, hit the icons, and still leave with enough city energy to explore on your own afterward.
FAQ
How long is the private Melbourne highlights tour?
It runs for about 4 hours.
What is the group size limit?
The tour price is for a group of up to seven people.
How much does the tour cost?
It costs $1,075.15 per group (up to seven passengers).
What’s included in the price?
Included are a local guide, hotel pickup and drop-off, private vehicle transport, and bottled water.
What is the meeting point?
The tour starts at Flinders Street (Flinders St, Melbourne VIC 3000, Australia).
Where does the tour end?
It ends back at the meeting point.
Are admissions included?
Most stops are listed as free, and Brighton Bathing Boxes has admission included.
Does it run in bad weather?
Yes. The tour operates in all weather conditions, so you’ll want to dress appropriately.
What is the cancellation policy?
You can cancel for a full refund if you cancel at least 24 hours before the experience start time. If you cancel less than 24 hours before, the amount isn’t refunded.