REVIEW · CITY TOURS
Melbourne City Centre Scavenger Hunt and Sights Self-Guided Tour
Book on Viator →Operated by Explorial · Bookable on Viator
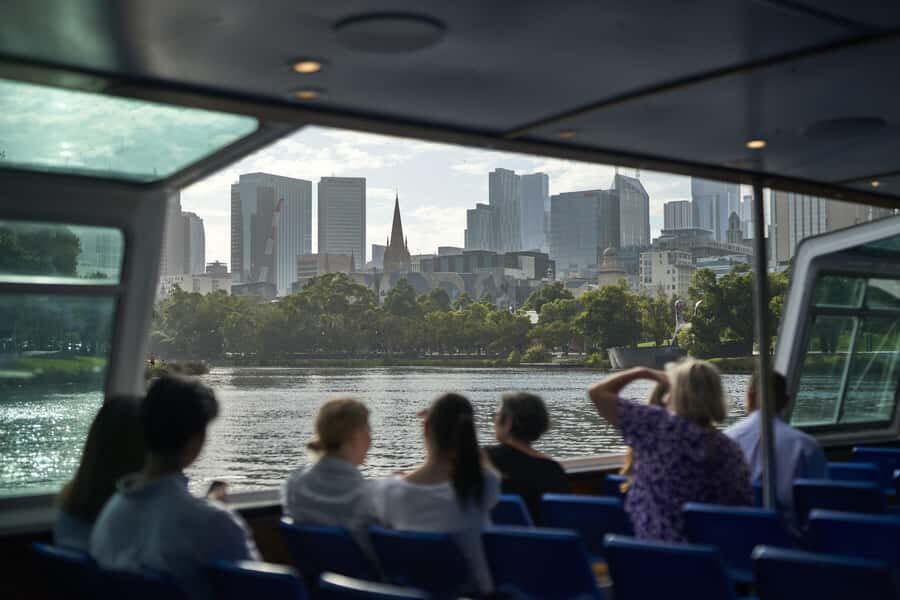
Melbourne by clues beats the usual sightseeing. This self-guided walk turns central stops like Flinders Street Station and ACDC Lane into a game where you solve prompts, earn points, and learn as you go. It’s a smartphone-based mix of walking tour and scavenger hunt, designed so you can pause, snack, and keep moving at your own pace.
My favorite part is how simple it feels to run: you start at State Library Victoria, use the map in the app to get to each location, and follow hints to the next task. I also like that the route is short and walkable, with classic landmarks close together—perfect when you want exercise without a full-day slog.
One thing to consider: the experience depends on the app working smoothly on your phone. One unhappy player couldn’t get it going at first and only fixed it after extra email instructions—so I’d make sure your phone is ready before you start.
In This Review
- Key takeaways before you play
- How a smartphone scavenger hunt changes your Melbourne walk
- The best reason to do this route: three stops that create a full city feeling
- Starting at State Library Victoria: the easiest place to begin
- Stop 1: Majorca Building — where you learn the hunt rhythm
- Stop 2: Flinders Street Station — the biggest landmark moment
- Stop 3: ACDC Lane — fast, fun, and built for photos
- How the clues, questions, and points actually feel on the ground
- Price and value: $13.34 for a 1–2 hour city game
- Timing in Melbourne: keep it flexible and still finish strong
- Who this scavenger hunt is best for (and who should skip it)
- Should you book this Melbourne city scavenger hunt?
- FAQ
- Where does the tour start?
- How long does the Melbourne City Centre Scavenger Hunt take?
- What are the main stops on the route?
- How do I access the tour in the app?
- Is the experience limited by time?
- How much does it cost?
- What is the cancellation policy?
Key takeaways before you play
- Phone-guided clues move you from stop to stop without needing a guide in person
- Questions at each sight use signs/pictures as part of the challenge, so you actually pay attention
- Photo tasks add a creative layer and make the walking feel less like homework
- Short, central route connects big names like Flinders Street Station with nearby lanes
- No strict time limit means you can take breaks and still finish comfortably
How a smartphone scavenger hunt changes your Melbourne walk

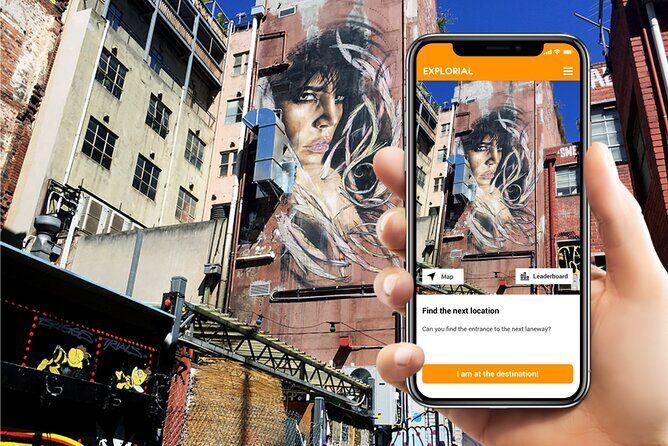
This isn’t a guided “look and listen” tour. It’s more like giving yourself a mission through the city center. You download the Explorial-App, start at the meeting point, then use your phone to follow hints to each stop. You’re not just moving between famous buildings—you’re actively solving prompts along the way.
Here’s what that means in real life: you’ll keep your eyes up and forward, not down at your map. You’ll also slow down. When you’re looking for a clue, you tend to notice details you’d otherwise zip past—signs, architectural features, and the little scenes around the streets.
You also get a built-in structure. Without a guide, it can be easy to wander aimlessly. The scavenger hunt format gives you a clear reason to walk to the next place, and then a clear reason to stop once you arrive.
And yes, it’s still sightseeing. You’ll reach landmark areas like the Majorca Building and Flinders Street Station, plus the fun, photo-friendly lane vibe around ACDC Lane.
You can also read our reviews of more guided tours in Melbourne


The best reason to do this route: three stops that create a full city feeling

The stops chosen for this hunt work well because they cover different sides of Melbourne in a compact area.
Majorca Building is a strong “start landmark.” It sets the tone right away: you’re not beginning in a museum; you’re beginning in the middle of the city’s everyday character.
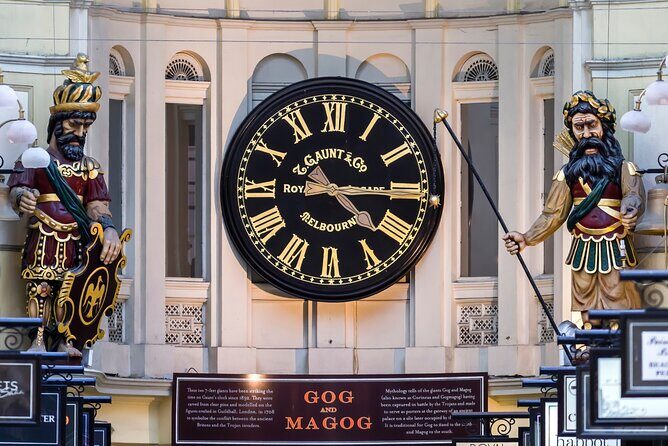
Flinders Street Station is the obvious classic. It’s one of those places where even if you’ve never studied it before, you know you’re in the center of the action. For a self-guided hunt, it’s especially useful because it’s easy to find, easy to revisit if you need a moment, and full of visual cues.
ACDC Lane gives you a different mood. It shifts from big-station energy to a narrower lane you can explore at a walking pace. For photo tasks and creative prompts, lanes like this are perfect because they give you angles and textures you don’t get on a wide boulevard.
The balance matters. If every stop were a huge indoor complex, the hunt would feel disconnected. If every stop were a tiny “maybe here?” street corner, you’d burn time. This set of stops keeps things varied while still staying practical for a 1–2 hour experience.
Starting at State Library Victoria: the easiest place to begin
Your starting point is State Library Victoria, 328 Swanston St. That’s a smart choice for a self-guided activity because you’re starting in a central area with plenty of surrounding streets to orient yourself.
The app experience is tied to timing in a way that helps you. You’re not given a strict slot to join with others. Instead, once you purchase, you receive an access code that you use in the app. Then you download the Explorial-App, go to the starting point, and start the game.
Two practical notes I’d follow:
- Give yourself phone margin time. Before you begin walking, make sure you can open the app and see your first clue. One review mentioned the app setup was confusing at first, and that delay ruined their run.
- Keep your phone charged. You’ll rely on the map function to get from one location to the next.
Once you’re started, you can take breaks. The hunt is designed to be flexible rather than rushed.
Stop 1: Majorca Building — where you learn the hunt rhythm

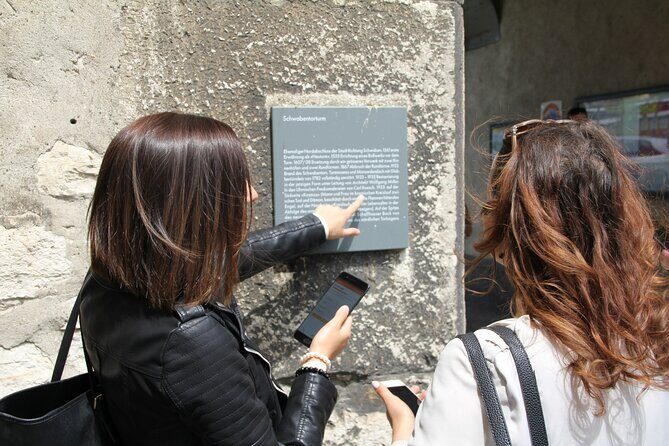
At the Majorca Building, the game usually gets you into the right mindset: follow the hint, arrive at the spot, then answer questions that are meant to be solvable on-site.
These questions are often tied to signs, pictures, or other visible details. That’s valuable because it turns “I’m looking at a building” into “I’m reading the building.” You’ll likely notice things you’d never think to notice on your own.
What to watch for here:
- Look around the immediate area where the clue directs you.
- Don’t assume you’ll get every answer from one view—sometimes you’ll need to reposition slightly.
- If there’s a photo task in your route, treat it as a chance to frame the building and surroundings creatively, not just a quick snapshot.
A small drawback: since it’s early, you might still be getting comfortable with how the app is prompting you. If your phone is acting up, Majorca Building is the first place you’ll feel it.
Stop 2: Flinders Street Station — the biggest landmark moment

Flinders Street Station is a centerpiece in the city, and for this hunt it functions like a “checkpoint.” You’ll arrive, solve your sight-related questions, and likely get a chance for an additional creative prompt.
Why this stop works so well for a scavenger hunt:
- It’s visually distinctive, so you won’t spend forever confirming you’re in the right place.
- There’s enough going on around the station that photo prompts feel natural rather than forced.
- You’ll probably learn more than you expect just by noticing the details the questions point to.
This is also where the format tends to pay off for families and friends. The station area can otherwise feel like “stand here, take a photo, move on.” The app adds reason to slow down and look closely.
If you want to make the experience smoother, plan for a short pause here. Stations are great, but they also tempt you to keep walking. The hunt gives you permission to stop when the prompt tells you to.
You can also read our reviews of more city tours in Melbourne


Stop 3: ACDC Lane — fast, fun, and built for photos
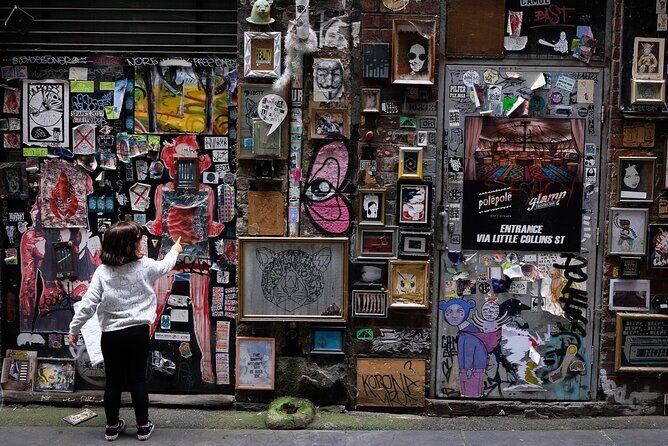
ACDC Lane is the final named stop, and it’s a great way to close the hunt because it shifts the energy from major landmark to street-level creativity.
This is where photo tasks make the most sense. A lane gives you angles. It gives you texture. It gives you a smaller “set” for your camera without needing a long trek.
Expect the game to push you to be a little playful here—think of it as using your phone’s camera as part of the puzzle. If you do well with the snapshots, you earn points. That point system matters more than it sounds. It nudges you from passive looking to active participation.
Even better, ending around ACDC Lane keeps you near lively areas in the city center, so after the hunt you’re not stuck in some remote spot with nothing to do.
How the clues, questions, and points actually feel on the ground

This experience is structured around three types of tasks:
Find sights: You use hints plus the app’s map function to navigate to each location. That reduces the mental load of “where is it?” and replaces it with “I’m close—now find the exact place.”
Solve questions: Once you arrive, you’ll answer prompts that usually rely on what’s visible—signs, pictures, and other on-site cues. This is one of the most effective learning styles for a city center walk because it rewards careful observation.
Have fun with photo tasks: Some parts of the hunt ask for creative photos. The goal isn’t fancy gear. It’s a playful way to look again and notice details, and the points system keeps it from feeling like random sightseeing.
One real-world advantage of the hunt format is pacing. Since it’s not time-locked, you can wait for a clearer view, catch your breath, or pause for a drink. You’re still progressing through the route without the anxiety of a group schedule.
Also, it’s private—your group only. That matters if you’re traveling with kids, friends, or anyone who prefers doing activities at their own tempo.
Price and value: $13.34 for a 1–2 hour city game
At $13.34 per person, you’re paying for a short, self-guided activity that blends walking, navigation, and on-site prompts. That’s good value if you like interactive formats more than straight museum-style listening.
Here’s the value logic I’d use:
- You’re getting a route plan across major central sights.
- You’re not paying for a guide’s time; you’re paying for the app-driven structure.
- The route is compact, so you get more payoff per hour than you might with something that requires long travel between distant stops.
If you’re traveling with family, friends, or a group that likes a challenge, this format also spreads out the fun. The photo tasks, in particular, make it easier for different people to enjoy the same experience without everyone doing the exact same thing.
The main thing that could affect value is tech friction. If your phone struggles with the app or setup, you might lose time or enjoyment. That’s the biggest “hidden cost” to consider: not money, but troubleshooting stress.
Timing in Melbourne: keep it flexible and still finish strong
The tour is listed as about 2 hours on average, and the experience can last roughly 1–2 hours depending on your pace. The key benefit is that it’s not limited in time, so you can explore at your own pace and take breaks.
That flexibility is perfect in Melbourne weather, which can shift fast. Even if you’re not sure what the day will feel like, you can adjust. You can stop for a photo when the light is right, slow down if you’re reading the questions carefully, or take a short rest and still continue.
Since the activity starts and ends back at the meeting point, you’re also not doing some one-way trek. You’re essentially building a loop through the center that brings you back to your anchor point.
Practical tip: wear comfortable walking shoes. Even if the route is short, you’ll still be moving between stops while scanning for clue details.
Who this scavenger hunt is best for (and who should skip it)
This is a strong fit if you want:
- A light, interactive city walk instead of passive sightseeing
- An activity that’s easy for groups to enjoy without a live guide
- A smartphone-based way to learn through questions tied to what you see
It also works well if you enjoy puzzles and small challenges. The hunt design turns the city into a problem-solving playground.
I’d be a bit cautious if you:
- Don’t like phone-based activities at all
- Have unreliable service or a weak battery setup
- Prefer a guided explanation with no self-direction
If that’s you, you might still enjoy the stops, but you’d miss the engine of the experience—the app clues and question prompts.
Should you book this Melbourne city scavenger hunt?
I’d book it if you’re looking for a fun, manageable way to cover central Melbourne in a short time, especially if you like interactive sightseeing. The format—questions at real landmarks, navigation via the map function, and creative photo tasks—makes the city feel like it has layers, not just locations.
Skip it or think twice if you’re worried about app setup or you hate tech troubleshooting. One major downside pattern is that the experience depends on the app working right from the start, and setup hiccups can steal the fun.
If you’re willing to show up with a charged phone and give yourself a few minutes to get oriented, this hunt is a smart way to see Melbourne while getting a bit of exercise and a real sense of progress from clue to clue.
FAQ
Where does the tour start?
The tour starts at State Library Victoria, 328 Swanston St, Melbourne VIC 3000, Australia.
How long does the Melbourne City Centre Scavenger Hunt take?
It lasts about 2 hours on average, and typically around 1–2 hours depending on your pace.
What are the main stops on the route?
The listed stops are Majorca Building, Flinders Street Station, and ACDC Lane.
How do I access the tour in the app?
After you buy the ticket, you’ll receive an access code that you use in the Explorial app.
Is the experience limited by time?
No. The tour is not limited in time, so you can explore at your own pace and take breaks.
How much does it cost?
The price is $13.34 per person.
What is the cancellation policy?
You can cancel for a full refund if you cancel up to 24 hours in advance. If you cancel less than 24 hours before the start time, the amount you paid is not refunded.